hands-on scienceScience in the City: hands-on science
Showing posts with label hands-on science. Show all posts

Aug 23, 2015

Secrets of Success: Proven Classroom Setup Tips

Hi All,

I was recently asked to share my tips for setting up the classroom.  I have been delaying writing this post because I'm not in a classroom this year, so I couldn't include pictures.  But...I have been in a classroom the last 10 years (12 if you count my time as a teaching assistant), in a lot of different settings, so I can still offer my advice.


I have been a teaching assistant in a few different special education, self-contained classrooms, I have been an adjunct college professor (only on campus to teach my course), and then taught in the district I currently work in.  I have been in 3 different classrooms in that district, and one year was on a cart.

There are certain features that I think are necessary in setting up a classroom, no matter what space you are in.  I would like to share those here.   I was also asked to share advice on setting up a classroom for multiple preps or multiple labs, that will also be part of this post.

Here are some views of a few of my classrooms over the years. (These are not all the classrooms I've been in, but those that I have photos of)


In all of those classrooms I think it is critical to have the following information (in no particular order).  I will highlight how I did a few of those in some photos below


  • Agenda so students know what is going on that day (and it helps keep me organized).  If I have multiple classes in the same room I have done a few things:
    • Erase and re-write
    • Write on a smaller white board that I can prop up and switch out
    • Write on chart paper and switch
    • Divide the board down the middle and write both agendas up
  • A place for students to hand in work.  I usually just accomplish this with a bin (the dollar store dishpans work great).

  • Student supplies.  This can be split into two types depending on your students, or grouped together.  
    • Things that are left out for easy student access, such as pencil sharpener, kleenex, maybe tape, lotion.
    • Student supplies that may be left out, or gotten out as needed.  For me, these are crayons, colored pencils, markers, glue, maybe extra tape, rulers.  I like to have these in small bins (pencil boxes from the dollar tree work fine, or other bins), so that you or a student can quickly put one out on each table. The colored bins on my cart were for that.
    • A place for you to keep upcoming copies, emergency sub plan, answer keys, etc that is readily accessible.  When I was on a cart I used a file box.  Otherwise I usually had a divider on my desk. 

  • A place for students to get missing work or make up work if they are absent. I just use a file crate and make a folder for each day of the week.  Then I make folders behind those for each week of the marking period.  At the end of Monday I put the extra papers in Monday.  When the next Monday rolls around I put them in week 1, etc.   You may want to post near this updated grades by ID number, or a list of missing work. 

  • A schedule or list of times you are available for extra help. 
  • Seating chart posted, if you plan to use one, so students can quietly go check if they were absent or forgot where they sit.
  • I also think it is important to have plenty of wall space or hallway space to display student work.  Students make poster assignments, concept maps, anchor charts, etc. and it is great to show those off, and to use them as a reference point later in the year.


Finally....lab space....

Since this is a science classroom (although I have taught lab science in classrooms that were not labs as well. I think it is key to have a space to set up equipment before class that students know not to touch until they are instructed to do so.  This might be a counter, a cart, a cupboard or wherever you have room.  Ideally each class, or each different prep will have a space.  When instructed, depending on how you run things, each group can go pick up one of each supply, or pick up a supply bin (my favorite), but you can get things set up and not have them right in front of students until you are ready.  The gray bins on my cart are usually perfect for this unless you are doing something really big.

The other key, I think, with lab space is to have some space (again, a counter, cart, cupboard, wherever you can find room), where you can leave some lab equipment out. I'm not advocating a mess, but if you have some students who don't finish, or an experiment that goes longer than one day, or even want to leave out just one set for absent students, it's great to have a designated space to do that.  Again, if you teach middle or high school and can designate a space for each different prep/class, that's even better.  Work with what you have.

  • Optional ideas, depending upon your school policy:
    • bathroom pass
    • early finisher ideas
    • work with no names, hanging up to be claimed
    • late sign in.
    • emergency sub folder (sometimes this is on your desk, or in the office)
I have resources that help with some of these (classroom scavenger hunt and signs, editable seating charts, and a few other goodies in my Back to School Pack).  If you made it this far in the post, you may want to check it out by clicking below :).


All of this is personal style, and may be different from teacher to teacher.  These are my preferences, and the things that I think are necessary, to whatever degree is possible, in any classroom setup.  

What are your classroom necessities?  What other questions do you still have? 


Jul 6, 2015

Blow Your Mind Guaranteed Leaf Stomata Lab

If you are looking for a lab to do with your students that only uses a microscope and basic supplies, here is a great one.  I tested it out ahead of time and got very excited at how successful it was!

I have used this lab to practice microscope skills, experimental design skills, homeostasis and adaptations, or to teach leaf structure directly.

Did you know that by just using clear nail polish and tape, with almost any leaf and a microscope you can clearly see the stomata?!   We teach about stomata but they always seem like an abstract concept that we can't see.  Not TRUE!

It is very simple to put nail polish on the back of a leaf, peel it off, and make an impression slide where you can clearly see the stomata.

In this lab activity students read about the leaf structure and color a diagram.  They also create a slide and view stomata, draw and label and answer a few summary questions about their knowledge.  There is a second version included that allows students to design an experiment related to stomata.   Finally, in the teacher resources guide I have included a few other links for information, and a video clip about the leaf parts.

Here is a direct link to my product below.

Jul 1, 2015

Inexpensive and Instructive Lab: Complete Flower Reproduction

When the weather gets nice, everyone loves flowers!  Its even better if you can integrate them into an educational lab and reinforce science content.

This flower reproduction lab is one of my personal favorites.  Students can dissect a flower and study the parts.  I use the lab after teaching sexual reproduction, and students answer the questions "do flowers reproduce sexually or asexually?" through their lab work.  In the lab, however, I have also included a more traditional version of the lab that allows students to learn about the parts of a flower.  This lab also includes links to some great videos on flower parts, and suggestions on sources for flowers, and type of flower to use.

This was one of my students' favorites on course evaluations.  I love the fact that they get to take a closer look at something they have probably seen, but never studied before.  It would be a great lab for summer school, because flowers are so readily available.


Sep 14, 2014

Learning Reflection Sheet Exclusive Free Gift


In secondary education I feel that we don’t spend enough time building relationships, and 
nurturing our students’ curiosity because we are bound by curriculum and pacing.   This sheet is something that I often use at the end of the class period in my own classroom.  We are only two weeks into school and I  and have already found that students are looking for my response each day, and are thinking about what to write during class (reflecting upon what they learned, or jotting down questions). 

This tool has become a great tool for formative assessment, and especially for 
differentiation. It is open-ended enough that the lower level students can simply 
state what they learned, or ask a question about the lesson, where higher level 
students can ask more in-depth questions, and I have an easy way built in to 
respond to them. 

I think it is critically important for students to reflect on their own learning, and, if needed, I can give a more specific prompt for the day. However, sometimes it is better open-ended.  On Friday I had one student write "I learned today that I need to come to this class ready to work, not fool around" .....If he learned that, I'm happy as well :)
Classroom freebies

Jul 23, 2014

Innovative New Resource: Observation, Hypothesis and Inference

Early on in the year in almost any science class, at various grade levels, students will learn, or reinforce, the difference between observations, inferences, and hypotheses.  These are critical science skills that students will use across other subjects, and throughout the year. Of course, these skills are ultimately leading them toward making inferences from data, setting up and successfully running experiments, and even making inferences in other areas of their lives.  When students make observations about the world around them, read a news article and infer from it, or make an inference about the interactions that they have with people around them, they are using these skills.  However, this is an area where many students need reinforcement and practice.

I created this set for practicing observation and inferences.


This set has two components, and can be used many different ways.

1) There are 10 pictures that are good for making both observations and inferences.  You can use these pictures for one or other other, or use them to have students practice doing both.  Here is a good example.

Students can observe a hyena, or a zebra head, grass, etc.  They can infer that the hyena killed the zebra, is eating it, is hunting, etc.  They may infer other information as well, such as where this photo was taken.

The second part of this pack is a set of cards.  There are 16 cards each with examples of observations, inferences, and hypotheses.  Students can use them in the following ways (and probably others that I haven't thought of yet): 

- card sort and separate observation, inference, and hypothesis
- get one card and identify which it is.
- match up/sequence -- for example, I observe that the person is very tall, I infer that he plays basketball, and I hypothesize that people who are tall play basketball better.

These cards and pictures can be used in a variety of ways, and with a wide range of student abilities to reinforce these critical science skills. 

I hope you enjoy, and please let me know any feedback that you have! 


Jun 29, 2014

Why Do I Teach Science: My Perspective

I am considering apply for the New York State Master Teacher Program.   I just took the Praxis on Friday and did well.  I am waiting for my letters of recommendation, and my complete evaluation (depends upon test scores).  I also need to write an essay.  The topic of the essay is "Why do you teach (your subject)?"

I have been tossing it around in my brain over the past couple of days.  Summer vacation just started so I have spent a lot of time with my kids, cleaning the garage, washing my car, doing all the things that I don't have enough time for during the school year. But in between that question has been bouncing around in my head.

In no more than 2 pages, double spaced....why do you teach your subject?

I have a lot to say, but am still refining and focusing my ideas.  I have to say, however, that it has really put a positive start to my summer vacation to think about the great parts of my job.  There are so many!

So far....I teach science because

  • It's fun!  What other job do you get to builds things, break things, look through a microscope and see life processes happening, and even go outside on a regular basis! 
  • It builds on students natural curiosity (yes, even high school students).  For many students, by the time they get to high school, this natural curiosity may have been partially weakened, waned, beaten out of them, or put aside for social reasons, but its still in there.  People are born scientists.  Toddlers ask questions, test things, and want to find out how the world around them works.  This passion can often be re-ignited, or is not completely gone.  Science is a way to get student's attention, and get them thinking and asking questions!
  • Students need to know how their own bodies and the world around them works!  As they go on to become adults, they need to understand how to make healthy choices, for themselves and their environment.
  • As they go on to become voters, citizens, and business people, whichever specific line of work that they enter, students need a basic level of scientific literacy.  They need to be able to intelligently understand news articles on science topics, and make informed decision.  They need to be able to read and follow a set of instructions and diagrams, as well as create their own.
Its pretty amazing to think that I'm a part of making these things happen!! 

Why do you teach science?  (Or your subject)? 

May 28, 2014

This is What Happens When You Get Out of the Classroom

I had the opportunity to take my students on a field trip....It was a great experience, mostly because it is so foreign to them.  Every time I plan a field trip it is so much work that I question if I will do it again.  But I always do. It is worth it to see the kids so engaged, and to see kids that struggle in the classroom be so successful in a different setting.  One student had never been out of our county before.  Another, since I teach in a very urban district, had never seen a real chipmunk.  That was a big hit!!  The trip was to Iroquois National Wildlife Refuge.  It is a program with a local college, so our students got to interact with college students (who were their guides).  They took a guided walk, did a scavenger hunt, and played some games.  The kids were afraid of the bugs and mud, at first, but they settled in and had a great time!  

If you have the opportunity to take your students out of their element, and expose them to new things, do it!!  Testing does not capture all that we do as teachers, or all the growth that our students have, but this is an important part of our role!


Apr 13, 2014

Making Student's Thinking Visible


Sometimes when students are learning a lot of new information, it is difficult for them to organize it, or keep the parts together that go together. They know the terms, and have some of the links, but don't quite have it all straightened out in their heads. 

Also, as a teacher, it can be difficult to sort out where they have misconceptions. Here is one tool that I used to do just that. Concept maps. 

I gave the students a list of 20 terms (with definitions) related to weathering and erosion. I told them they need to use 15. I showed some examples of concept maps on the board and the linking terms.   I had them write the words they chose on post-it notes.  I had them organize the terms on the large paper, then add linking words to explain how they were connected, and then add at least 5 pictures (I had many pictures available for them to choose from).  

For my higher students, this was really an opportunity for them to tie together their knowledge, and organize it.  They felt like they benefited, and caught many of their own misconceptions as they were trying to connect the terms.  

For the lower students, I was able to see their errors or confusion when they laid out the terms, and help correct those, or talk through with them how the concepts could connect, and which didn't make sense.

I think it was a beneficial exercise to wrap up a unit, and they love seeing them on display in the hallway.

If you are looking for complete vocabulary lists, and concept lists for Earth Science, a good place to look is in this product, or your district curriculum.


Feb 9, 2014

Earth Science of the Olympics Freebie

Another Freebie!! 

Similar to last week, but that one was a big success, so hopefully some people will enjoy this.

Last week I posted a "Science of Football and Olympics" in honor of the Superbowl.  It was focused on biology and life science topics.  

Here is one for this week focused on the Olympics, but focused more on Earth Science topics.  I hope you enjoy!  This is a great way to work in Common Core, relevancy, and grab students' interest

Science of the Olympics
Hope you are having fun watching the Olympics.

And I promise some posts of more substance coming soon....some things are in the works here! 


Classroom Freebies Manic Monday

Feb 2, 2014

Science of the Olympics and Football Freebie

I am trying to link up more frequently with Charity Preston's "Manic Monday" which is a huge resource of K-12 free resources.

I want to share with you some of the small things that I'm doing in my classroom.

This week we had a lot of state testing, and I needed something to "fill" at a time when kids were finishing, but some kids were absent.

I created this "Science of the Olympics and Football." Kids loved it!  Mine is focused on life science, but it could easily be modified for a different class.

The activity could also be given for homework or extra credit, and is very timely right now.

It is based on this resource from NBC.

Also, it is a great common core connection.  The videos have transcripts, if you want students to be able to read the transcript.  Text does not have to be only written text in a book.  This is another great tool to build in relevancy, and text analysis skills.


Classroom Freebies Manic Monday

Jan 6, 2014

How to Clarify Photosynthesis & Cellular Respiration: A Free Foldable


Teaching Photosynthesis and Cellular Respiration

Here is freebie for you.  I don't know if anyone else is enjoying a snow day, but I'm using it to get a few things done (one is getting this photosynthesis and cellular respiration resource polished up and posted).  

A free resource

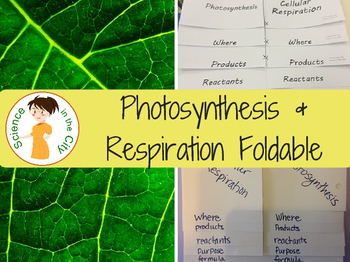
Here is a FREE FOLDABLE that compares cellular respiration and photosynthesis.  Students so often get confused, but it really can help to clear up misconceptions when they see the two processes next to each other, and compare them. This foldable has students break down both processes into categories such as where they happen, what are the products, what are the reactants, and more.  

It really helps students to visualize, and to see how the two processes fit together. 
 
This freebie gives you the basic directions to make the foldable.
 
Comparing Photosynthesis and Cellular Respiration Foldable 
 
Enjoy! 
   
If you are looking for a more polished version, that includes a printable template and more complete directions that is available here
Photosynthesis and Respiration Foldable - Two Versions

For more information on how I use foldables, and why they are a great strategy for your students, you may want to check out this link on reasons to use foldables with your students.

If you have never used foldables, this article is a good explanation of why they can be really beneficial.

Other Photosynthesis and Respiration Resources

If you are teaching photosynthesis and respiration, they can be confusing for students.  It often helps to sort the terms and components into categories: photosynthesis, respiration, or both.  I have my students do this digital version, and they really get into it!  Students can move the words and sort them into the correct category.

An example of a digital resource to help students understand photosynthesis and cellular respiration

Depending upon the class, sometimes we do it together on the board, or in a 1:1 setting they can do it on their device. It can also be a great station as part of a review activity.

These topics can be confusing, but even some of my struggling students were able to learn them successfully when the processes were broken down, compared, and they were allowed to practice with them.  How else do you help your students understand photosynthesis and cellular respiration?


Jan 4, 2014

Looking for Task Cards That Will Make Your Students Study?

I don't  know if you have used task cards yet in your classroom.  I had never heard of them until I started hanging around the Teachers Pay Teachers forums, and reading some of the other blogs.  Even after I heard about them, I was afraid they were too elementary.  It seems like the elementary teachers are often the ones talking about task cards.  Boy.....I was missing out.  I haven't used a few sets, in a couple of different ways, and plan to use them more often (I am teaching all high school this year). 

If you haven't used task cards in your classroom yet, they can be used a lot of different ways.  They could be a warm-up or closure activity that is used with a projector (in my set I created a full-size version and a 4 per page, card version).   They could also be used for review activities such as "scoot," "roam the room," or put a few at each station.  Another one of my favorite things about task cards is that they are easy to differentiate.  In my set there are 5 different levels of questions on each topic.  You can certainly pick and choose which cards you use, or which cards are used by each student (you can even assign them card numbers to work on).   

For more information on task cards, click here or here

I created my first set to post on Teachers Pay Teachers.  See the picture preview below.  


They are human body systems task cards.  This is a topic that is commonly taught in 4th grade, again in middle school, and again in high school (at least here in NY).  These cards go from a basic level to more complex.  They include a total of 50 cards, where 5 of the cards on the human body systems in general, or together, and then there are 5 cards on each body system.  

Here is my first bit of feedback!   That makes my day!! 
 Do you  have particular topics on which you would like to see task cards?  What tips do you have for using them?

These are also part of a larger bundle of human body activities, which include labs and foldables on the respiratory system, digestive system, circulatory system, skeletal and muscular system, and nervous and endocrine systems

Human Body Systems Bundle

Nov 27, 2013

The Wonderful Power of Videos in the Classroom

I don't know if your students are anything like mine, but if they are, there are days that getting them focused and paying attention is a losing battle. Even if they are quiet, gettting them focused and attentive is a different story!

Here's a strange thing that some of us in my department have been noticing lately. Students pay attention to a video clip much better than they pay attention to me. I have used this in a few different ways:


-- using video clips such as this that I have found online, and then creating a guided note sheet, questions, or an assignment to go with it. Here is one example of a great instructional video. http://m.youtube.com/watch?v=qhvSX0-I9N8There are a lot, usually about 5-10 minutes long that can replace notes, introduce a topic, or reinforce notes.  It's similar to the idea of the flipped classroom, in a way, except I'm doing it in class in this case, student can watch together in the board, or in their own on device,depending on the time you want to spend, and the structure of your class/access to technology.  Kids say to me things like "remember on Friday in the video when that man was talking and he said...."  

-- I have also created or found some even shorter video clips and photos to give lab instructions, and to show a model of something. It's big, easy for everyone to see, and they can rewind if needed. For example, I made a video of making the onion cell slide. Not great, but it was my first one. Easily filmed with a cellphone, tablet, webcam. For some reason, they seem to remember. 


Do your kids respond differently to a video?  How do you use technology innovatively in the classroom?  


Jul 27, 2013

Back to School: Fantastic Free Common Core Resource

If you are getting ready to teach this year, you are probably thinking about Common Core!  Here are some great resources to help you prepare for the year!  A group of sellers contributed, and some excellent leaders at TpT compiled these fabulous back to school common core ebooks.

There are books for each secondary core subject, k-2 math and ela, and k-3 math and ela. They include common core tips, free resources, and some paid common core resources. 

Check it out!

Here is the Science Book.  When you click on the science book, you will also see the other books!

Science Back to School Common Core Ebook


Jul 25, 2013

New Resource to Share and a Puzzle for You

My blog has been quiet lately. I apologize. I have been enjoying the summer, as I hope you have been too. I have been working on doing some small home improvements, playing with my kids, and just relaxing!  Such an important goal of the summer!! In between all the time of not doing work, however, I went to a professional development and was introduced to an amazing website that I wanted to share with you!

The Ithaca College Look Sharp project focuses on media literacy. They provide case studies and lesson plans in many different subject areas related to media literacy. These are definitely common core related, and critical to becoming informed and educated citizens!  

Here are few pictures from the PD that I attended. More details soon. If you have an idea what these activities were about, please leave a link in the comments.  


Jul 3, 2013

5 Ways to Make Science Class More "Fun"

My boys are interested in science, but my older one (who is in school), seems to do a very limited amount of science. I am biased, being a science teacher, but now that summer is here, I signed them both up for a half day, one week, camp at our local science museum. I am so impressed at the amount of content that they can get across to a very young audience (ages 4-6), in a short amount of time (2 hours).

Both of these classes have a very high student-teacher ratio, seem to have a good supply budget, and have students and parents who are invested in being there, etc, but still, I wonder what lessons we can take away from their classes to our classrooms. 

My little guy is doing "Exploring Science". It is a 4 day camp. So far they did one day of living things and one day of chemistry. They saw pictures of X-rays, saw skeletons of some animals, and colored pictures of plants, as well as started a seed. That was all in the first 2 hours. On the second day they made oobleck, tried different things to melt ice, and made a volcano model and read a story about bubbles. 

My older one is doing "The Great Ice Age."  They have already tried different ways to melt ice too, went  into the museum to see the glacier and wooly mammoth, read a story about the first mammoth discovered, and how mammoths used to be hunted, and played with "fossils" in the sand table.  On the second day they made an elk mask, made a diorama of a saber toothed tiger habitat, and he came home with lots of other tidbits -- did you know some plants survived the ice age?!  Did you know there used to be a glacier here?!

A diorama of a sabre toothed tiger.  Under the moss is a volcano! 
A Woolly Mammoth
They were both so excited. My little guy had trouble verbalizing some of what they did and trouble connecting it to what he learned, but I have no doubt that the experiences are good. My older one was so excited to share all of his new knowledge. 

Lessons I think we can take away from this, into our own classrooms: 

- show examples, even if its not an activity, but just show
- read stories and kids books, even to older kids
- make it relevant to where they live
- make it creative, and allow them a chance to express themselves

What I also noticed, because its younger kids and because its not school, they aren't writing anything about what they did.  That is good and bad. They aren't doing any worksheets. But are they learning?  Absolutely!  How do we practice writing and connect to common core?  Maybe do few higher quality writing pieces?  How do we assess their work without writing and worksheets?  Maybe with a rubric and conferences?  Maybe verbal explanations of a project?  This is harder, to me. I'd love to hear your thoughts on how to do this, in a regular classroom setting. 

Maybe it's just foreign to me because I'm used to older kids?  

What thoughts do you have?


Jun 27, 2013

4 Ways to Make Something Abstract Kid-Friendly

During this last week, I went to a museum with my kids and saw this solar clubhouse.


This is clearly a clubhouse made for younger kids, but it is focused on solar energy. I think the size and look of it is immediately inviting to kids, and then when they walk in, the parts are labelled, and explained in fairly simple language. My 6 year old didn't understand all of it but was very interested to read and try to understand. How can we bring this experience to the classroom?

I think we need to keep a few lessons in mind:
1) Size. The size of examples and demonstrations, etc., can really change how it is perceived. 
2) Accessibility, and initial appearance. This is small, at eye level, brightly colored, etc
3) Relevance. Because its a clubhouse, and the examples are plugging in a light or tv, it is more understandable. 
4). This is all done without lowering the level of content. The concepts being explained are still complex and not oversimplified. 

What else do you see that you can take away from that example?  How can we bring this into our classrooms?  I think these are principles that we know, but often lose track of while teaching "curriculum"

Anything you have done that is a good example of this kind of teaching?  Or anything you've seen? 

Thanks! 


Jun 11, 2013

My Perspective: Why I Don't Use KWL Charts


My son recently did a unit on earthworms, in first grade. He learned a lot, and they had a vermicomposting bin, as well as reading and writing about earthworms.  It was a really cute unit, and he learned a lot.

However, they started off the unit with a KWL.  What he wanted to know is "How do worms communicate?"  A very interesting question, and one I didn't know the answer to (chances are his teacher didn't either).  Many times throughout the unit he came home saying "Guess what I learned....but I still didn't learn how worms communicate."

At the end of the unit, a sad boy came to me....we still never learned how worms communicate.

As a teacher, and a parent, I went online and looked it up and discussed with him.  However, how many parents don't have the knowledge or resources to do that? Or how many kids wouldn't ask, but on some level would know that their question hadn't been answered.

What does that teach kids about education and school?  If you do use KWL charts, how do you address the questions that kids come up with that are just not in your curriculum, you don't have time for, or you don't know the answers? 

In a perfect world, we could pursue their interests, but since we are all on such tight curriculum schedules and standards, I think this sets a bad precedent.  What do you think? 


Related Posts Plugin for WordPress, Blogger...