Search results for googleScience in the City: Search results for google
Showing posts sorted by relevance for query google. Sort by date Show all posts

Apr 5, 2016

What You Need to Know to Use Digital Interactive Notebooks


Digital Interactive Notebooks in Google Drive

As more and more schools are moving toward chromebooks, or use of Google Drive on laptops or desktop, it presents some opportunities that you may not be aware of.

Most people are aware of using Google drive for students to write a document and 'share' it with the teacher, or even to collaborate with another student to create a document together.

Google Drive can also be used to share information such as readings, slides, videos, etc. 

There are countless blog posts, websites, and resources available on using Google Drive, and Google Classroom.

Google Drive and Google Classroom Resources

Here are a few resources to get you started:
I have been using Google apps quite a bit over the last two schools years, but I have been stuck at times because I do things with a lot of diagrams in them, and I use interactive notebooks. I was nervous for students to have some work on the computer, and some in notebooks.

The switch to Digital Interactive Notebooks

I am making the switch to electronic INB's, with a few tweaks that I wanted to share with you
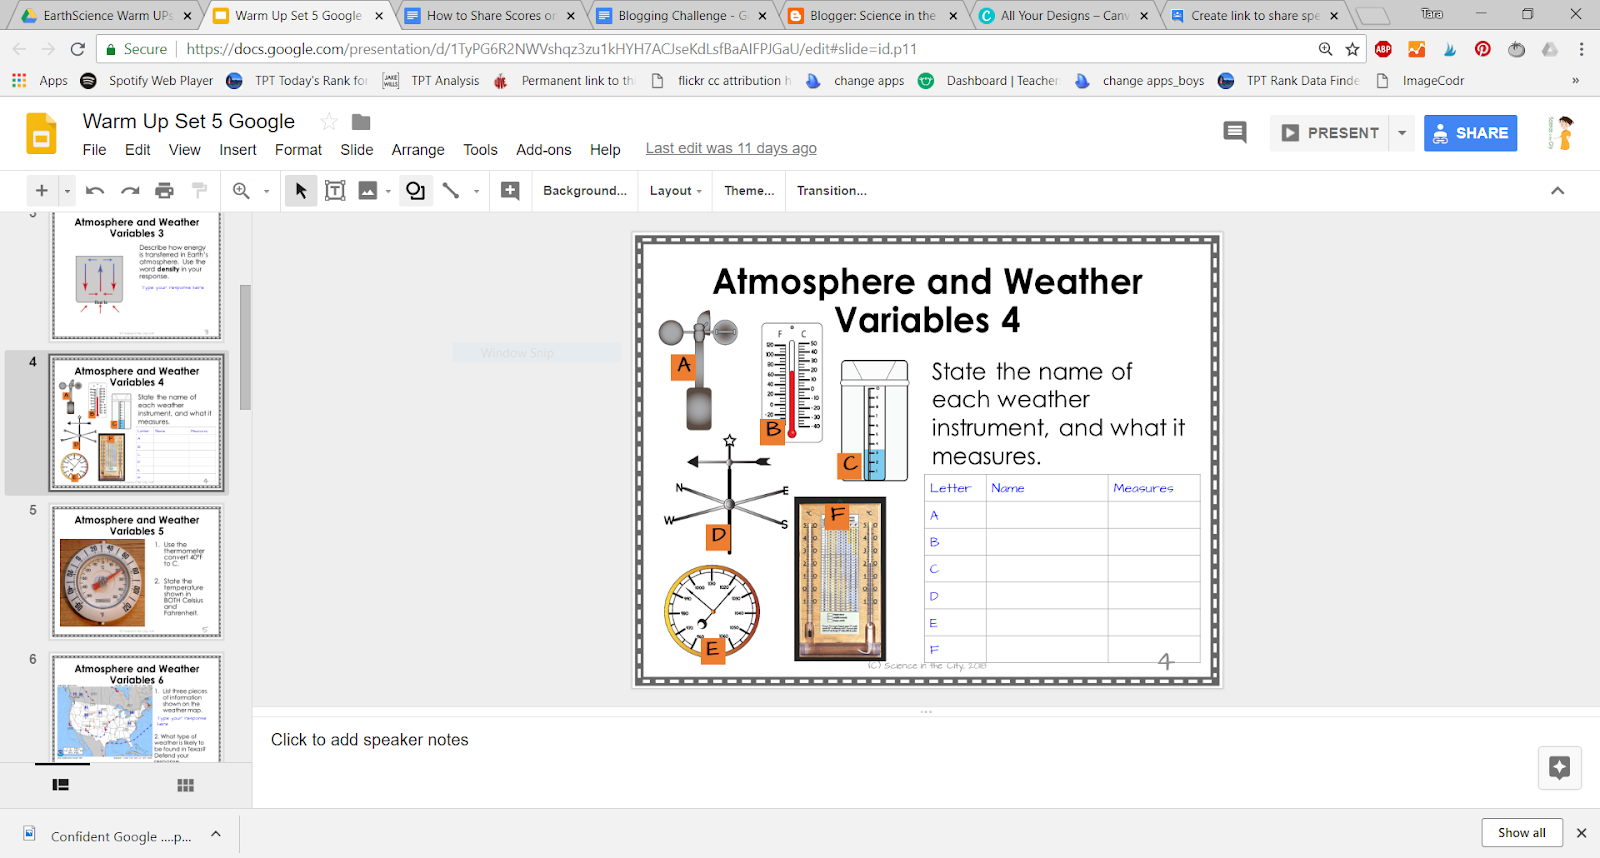
  • Most INB pages can be in google slides, making it easy to combine pages, add and move pages, etc. 
  • If they do something on paper that can't be replicated electronically, such as a hand drawing, they can take a picture of it and insert it.
  • If I have diagrams that need to be labelled or colored, this can be done.

An example of a converted resource

I converted my Circulatory System Foldable (paper version) to a Google Drive version.  You can see a preview of it below:


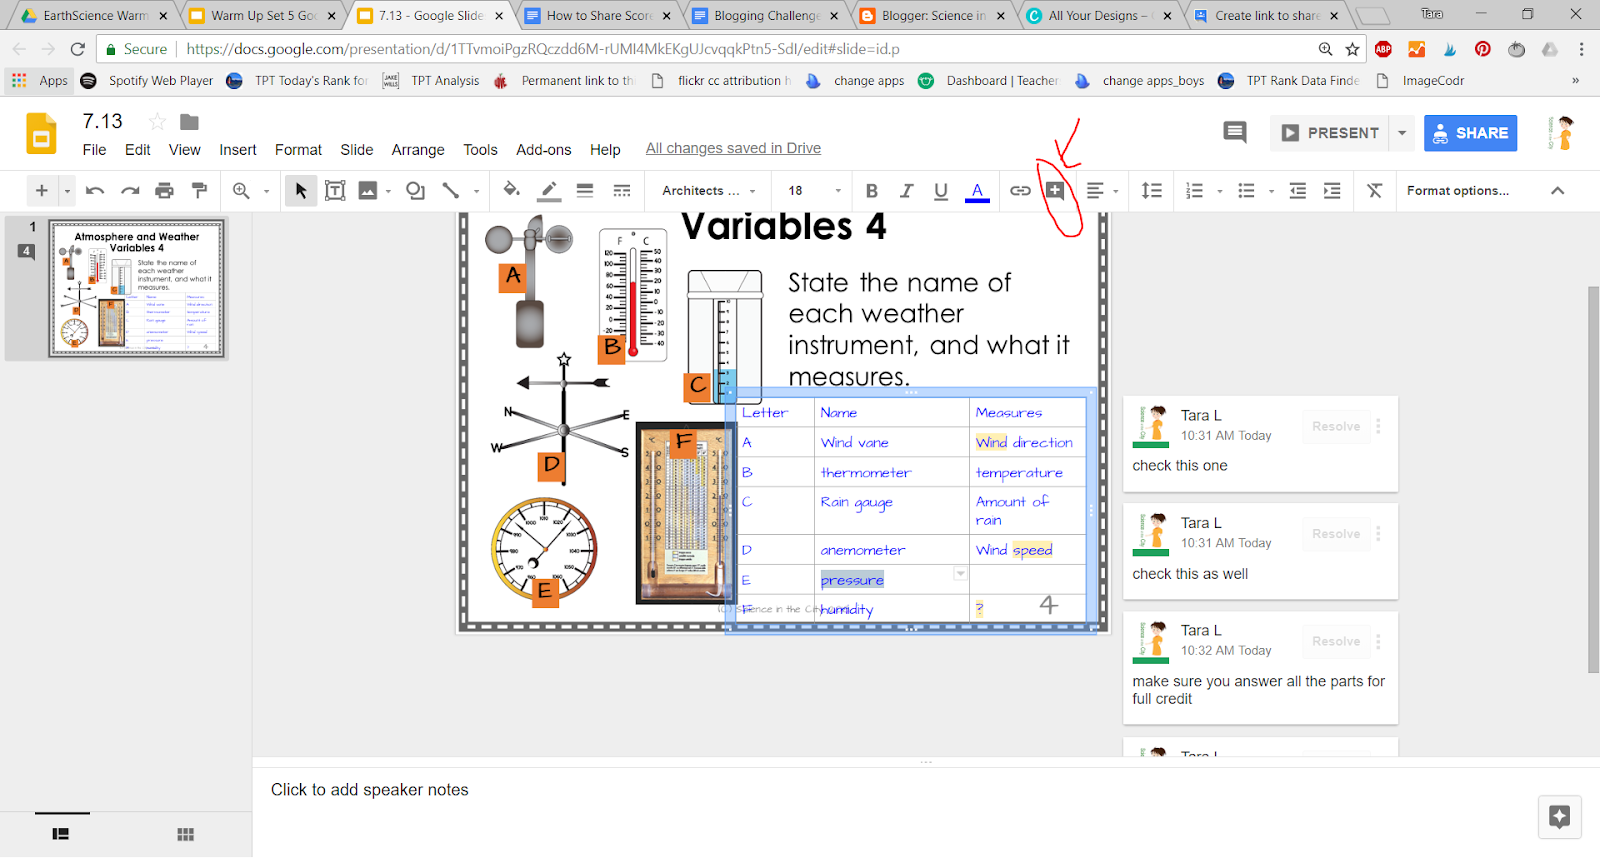
I'm finding that students are more successful working on Google Drive because their work is automatically saved, searchable, and not lost! It eliminates the forgetting of papers, and losing papers.  Also, if students are messy writers, or get frustrated with mistakes they might make, this lets them produce a neat and clean copy. If you use Google Classroom, it also is a great help with absent students.  They can check there for any missing work.

Here are a few other shots of this digital product, compared to the paper copy.

Digital interactive notebooks in the science classroom with an example by Science in the City

Digital Notebook Resources

If you are intrigued, but not quite sure, here are a few other links to some ideas on doing interactive notebooks in Google Drive:


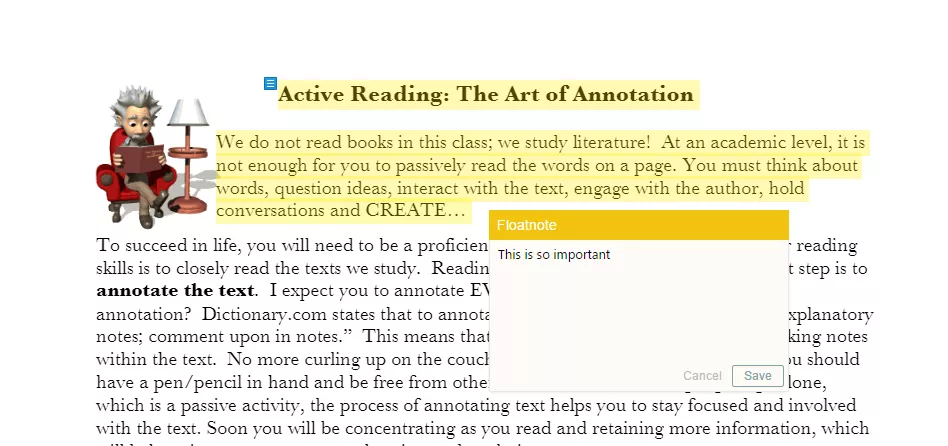
If you are using Google Drive, you may also want to be aware of how to use Google Chrome Extensions to help differentiate.   
Click here for a free starting guide to differentiate with Google Chrome

I'd love to hear how you are using Google Drive in your classroom, or if you are doing Digital Interactive Notebooks in another way.  If not, what reservations you might have. Please comment below and share your experiences. 

Other Example Resources

Here are a few other resources that I've converted to Google Drive format: 


Jul 29, 2018

Sharing Feedback on Google Assignments

Sharing Feedback on Google Assignments

When students are doing an assignment in Google Drive one of the difficulties maybe how to best get their scores and feedback to them. This is especially true if you are doing a series of smaller assignments, such as warm ups.


A few general ways

There are a few general ways to do this and I will give you some tips on each one. 

  1. Use a learning management system, such as Google Classroom (probably the easiest), Schoology or many others. 
  2. Give them feedback directly on the document using the comment tool 
  3. Create a spreadsheet or PDF document that lists grades by ID number. There are pros and cons of each of these of course.

In Google Classroom

In Google Classroom it can be pretty self explanatory to grade an assignment there, and give feedback. Then those grades will likely have to be entered into your gradebook, unless your school has a way of importing them.

Sharing a Single Slide and Giving Feedback

I have sets of warm-ups that are a set of Google slides that cover the whole unit. For example, here is a set that I have on weather.


If I want to share only one slide with a student that day, I would do the following steps:
  • Copy that slide to a new presentation
  • I would share with them through either Google Classroom, or by creating a force copy link. 
  • You can see what the student sees by clicking here.
  • The student then can type directly into the slide, and then either submit through Google Classroom, or share back with me. For me to be able to comment, they must share with either ‘can comment’ or ‘can edit’
  • It then becomes very easy to comment on their work, from my computer. More information on using comments for student feedback is available here.


If I do it this way, I often keep a piece of scrap paper next to me to record their grades, or another window open to record grades as I go through, if I am not using Google Classroom.

Google Forms and a Spreadsheet

I discussed how I use Google Forms and create a spreadsheet by ID number in this post.

Other Tools and Tips

There are other tools as well, which I will touch on just briefly.
  • If you are often entering repetitive feedback, and want to have a bank of comments, feedback, and even stickers that you can use, take a look at this article on using Google Keep for Quick Student Feedback

  • If you (or your students) would find it helpful to give spoken feedback, look into the Kazienza app. It is a very simple Google Chrome app that enables verbal feedback.

  • Only in Google Docs (not Slides, etc), there are several tools for rubrics, which can also simplify the process of grading and giving feedback to students. This can also be done within Google Classroom. And lastly, one more Google Classroom rubric hack.

I hope that these tools help make your digital transition a bit easier, as you find more effective ways to manage your grading and give feedback to your students.


Aug 28, 2016

Sick and Tired of Grading? Save Time With Google Forms

Tips to save time grading work in google forms


Save yourself time easily grading work in Google forms. Forms are great for collecting information, and they can also be great for any type of assessment, but if you are new to google forms you may be wondering how to quickly and easily grade the work that comes in.  I have had a couple of questions from other teachers who are using my year long google form assessment resource, and that prompted me to write this up.

When you switch over to google forms you will be able to spend less time grading, reduce or eliminate carrying stacks of papers around, and have more free time for other things.

If you are administering an assessment that is mostly objective, it can be automatically graded.  Meaning you don't have to do any grading at all!!  There are also times you want to grade by hand, and I will show you some easy tips to do that, which will save time in class and for you, outside of class.


Sep 27, 2015

Google Forms: Revolutionary Technology in the Science Classroom

There are so many kinds of technology that I use on an almost daily basis in my science class to improve life and education for my students.  Today's post is going to focus on a tool that I use almost everyday -- Google Forms.

If you have never used google forms before, here are some tutorials. They are VERY easy to use.

All you need is a google account (personal or professional, the students will never see your email address). You can go to Google Drive and create a new form, or go to forms.google.com.  You create a form just like you create any other document, and you can choose what type of questions you want (multiple choice, short answers, scale, checkboxes, include a picture or video....).  Your answers will automatically come to a Google Sheet (like excel), and you can also get a summary of responses.  This means google will aggregate the data for you, and show, immediately, for every question, the number of people who chose each multiple choice answer, or a list of the responses.  The responses will show up on real time, so you can immediately see your students' responses.


Here is an example of the summary of results that you can get immediately after students respond.


Before I get into ways that I used google forms in the classroom, a couple of other tips that I wanted to share with you.


  1. The snipping tool in windows is a great way to include any images that you want to add in.
  2. There is an add-on called flubaroo (there are lots of great tutorials online) that will automatically grade multiple choice for you.
  3. If you only want the form available at a certain time, or to end at a certain time, you can toggle on and off the 'accepting responses,' as shown below

Ok, so on to how I use google forms in the classroom.  

I had three main uses for google forms that I want to share, although there are many others.

  1. I used it for myself to track parent contacts.  I made a quick form with boxes for student name, method of contact, and what was discussed (time and date are stored automatically).  I put a bookmark to this form on my toolbar and could quickly enter any parent contact.  Then I ended up with a spreadsheet that I could sort or search of all my parent contacts.
  2. I used google forms at the end of each unit, or topic, to do a quick survey with the kids around the learning objectives.  I could immediately get a pulse on how they were feeling about the various objectives, and know where to focus my review.  I could pull the summary up on the board and work of off that to review.  I found it much more effective that asking them to ask questions, or openly self-report. We could all be on the same page.  I had them take notes as we were reviewing. 
For example...


3. I used google forms on an almost daily basis for warm ups.  We were a 1:1 chromebook school last year, so this might not be feasible otherwise, but it is certainly something to consider for those days you have device access, or even if you want students to access on any type of device.  I would usually give them a shortened link (from goo.gl) or post the link on google classroom.  Then my form would show 2 or 3 warm up or ticket out questions.  I could even include a video on picture. I could turn the form off when the time was up, and pull up the responses on the board so we could see where we are as a class, and if we are ready to move on.  

Have you used google forms in your classroom?  If so, where do you see it being most useful?  What other technology do you use? 


Aug 20, 2020

How to Download Google Drive Files in Multiple Formats

We all have probably heard a lot about Google Drive by now, but what if you are a Microsoft school?  Or what if you want to use a resource with less technology, or in a different format?  Are all these Google Drive resources useless to you?  NO!! In this post, I hope to detail how you can still use many of these resources.  


We all have probably heard a lot about Google Drive by now, but what if you are a Microsoft school?  Or what if you want to use a resource with less technology, or in a different format?  Are all these Google Drive resources useless to you?  NO!! In this post, I hope to detail how you can still use many of these resources.

Google Forms

First of all, Google Forms are basically exclusive to Google.  You cannot directly use Google Forms in another format.  HOWEVER, they still work well on mobile devices, embedded, or with a simple link, as a way to quickly collect responses.  So don’t let that stop you or deter you from using Google Forms. They work well on almost any device. 


Google Docs or Slides

Most resources that you encounter will be in Google Docs or Slides format.   You can generally convert these to MS Word or PowerPoint in seconds.  You can also print to PDF, with one caveat. Obviously, if you have interactive features they will likely need some modification to work well on paper, but that may not be a big problem. It’s easy to add directions such as “draw arrows” or physically cut out the pieces.  


To make this change, use the steps in the following diagram: 


What are the various file formats? 

The two that will probably be the most useful and immediately recognizable are Microsoft Word and PDF.  However, there may be others in here that are useful to you as well.  I have found often people don’t know this menu is available. 


If you have further questions, additional comments, or examples of how you have used this, I would love to hear it!  Please leave a comment below, email me, or post in our Facebook group. 


I hope this makes some of the many Google Resources that are available even more useful and accessible to you and your students. 


Jan 5, 2016

This Will Make You Want to Use Google Chrome With Your Struggling Students

Description of Particular Chrome Extensions that can help provide accomodations

As we know, reading and writing are often huge barriers learning content for special ed students, ELLs, and others.  If you have access to technology, there are some easy tricks to help differentiate, and break down that barrier with your students.  Specifically, within Google Chrome, or on a chromebook there are some easy ways to modify assignments and make them more accessible!  Help level the playing field for your students!

Jul 6, 2016

Can I Annotate Text in a Blended Classroom?

ANNOTATING PDFS AND WEBPAGES IN GOOGLE CHROME

If you use Google Drive with your students, or for your own use, you may want to share pdf files or webpages with your students for them to read.

In a traditional paper and pencil, face to face classroom we spend a lot of time teaching students to annotate text. This is a skill that we don’t want to lose when students read online. There is extensive evidence about the importance of annotating text. It is part of the new common core standards. Yet, as we move toward more web-based coursework it becomes difficult for students to highlight, underline, and make notes in the margin.


These ideas ARE compatible. There are several free chrome extensions and apps that will allow you to do just that. Before we get into the specifics of a few top choices make sure you know how to sign into chrome.

Getting Started

At the top of the chrome window is a spot to add a user, switch user, sign in, or sign out. This is important because when you sign in, your extensions and apps will be saved. You will sign in with your google credentials, just like you sign into gmail or Google Drive.


In order to annotate pdfs or webpages, here are a few of my top options, with some discussion of each one:

Examples

Kamipdf – Let’s you upload pdfs from Google Drive, your computer, dropbox, and box.net. It also has a paid subscription, but a free subscription would probably be enough for most people. When you upload a file, there are a few tools, such as split and merge, OCR, but most importantly are the annotations tools. Once you upload a file, you have the options to add text, strikeout, highlight,comment, and even add some basic drawings. A quick sample is shown here.


When you are done, you have the option to download your document with the annotations, save to google drive, or print (with or without annotations). You can use Kamipdf as a website, or as a google chrome extension.


Xodopdf works very similarly. It is also available as a website or a chrome extension. It also has an app, so that it can be used on a tablet or phone. It seems to have more options that extend across different platforms, but perhaps a few less annotations tools. Overall, they look very similar, but it depends on your personal preference. Edits and annotations can be saved to your drive, and shared.

Both of these tools are great for pdfs, but what if your students are working on a website and want to be able to highlight and annotate?I tried out a few that were ok, but I wasn’t thrilled. I tried Annotate! and f1000 with mediocre results. If you want students to be able to annotate webpages, there were a few tools that I really liked!


I was really very impressed with Diigo, which allows you to sign in with a google account, an advantage to students having to remember another login. It also allows you to annotate both webpages and PDF files. The annotations are then saved to your account. However, it is NOT free. There is a free plan, but it is quite limited. See here for plans and pricing.


For free options, Hypothesis seems quite good. You have to set up a free account, and you have to make sure that when you are on a webpage the toolbar icon is active. There were some webpages where I had trouble making it work properly, because I could not highlight the text (NYTimes.com, but I think that’s more a function of the website that hypothesis. When it did work, it was impressive. You can highlight or annotate, and then you can choose to share your annotations or keep them private. You can also share them with a group, if there is a group created.


I hope this is helpful to you, and please feel free to leave a comment or email with a question. As we have moved more and more towards 1:1 technology, and away from paper and pencil textbooks, being able to interact with text is a concern. Many of my students are not strong readers, and need to practice these reading skills, within an online environment.

There are ways to do so. Do you know of others? How do you solve this dilemma in your own classroom?

Oct 22, 2017

Easy Bite Size Steps to Increase Classroom Technology

Bite Size Steps to Increase Classroom Technology

Easy Bite Size Steps to Increase Classroom Technology

If your school has just recently gone 1:1, or just announced that they will be going 1:1, hopefully I can help. This is part 2 in a short series to help you transition to 1:1 technology.

This post will assume that you have gotten some of the procedural details and routines out of the way that were discussed in Part 1. Now you are looking for some ways to transition into using more technology in your classroom.

Ten Small Steps to Start Using Your New 1:1 Technology

  1. A video station - There are huge advantages to having students watch at their own pace, and be able to rewind, pause, or replay as needed. Here is a good discussion of using videos in the classroom. One of my favorite strategies is to have the students watch at a station, with a partner, and do a strategy that I call “watch, talk, write.” Students watch a short video with a partner. Talk about it with their partner. Then they write a short summary, often of a specified number of sentences, where they have to decide what information to include.
  2. A vocabulary station with Quizlet - Quizlet is a great site for students to review vocabulary, or really anything that needs to be memorized. You can even add in diagrams with labels where students can quiz themselves. This could be an early finisher activity, a station, or a whole class activity. 
  3. Review games using Kahoot - Kahoot is a great way to do review. It can only be used for multiple choice or objective questions, but students get so engaged! Its quick and easy to set up, and students love it. 
  4. An alternative way to do a research project - rather than only a written essay or research paper, check out these ideas for technology-rich ideas for students to demonstrate knowledge.
  5. Formative Assessment - My favorite formative assessment tool is Google Forms, but there are many others out there as well (Socrative, Plickers, and many more). I have written about Google Forms a few times before, here, and here, and a bit about Plickers here
  6. A virtual field trip or interactive website. Here is a great start on places to look for interactive 
  7. Resources for kids to use when they finish early - Having technology in your room gives more options for differentiation, in a lot of ways. However, one great tool is the ability to have more websites available for early finishers for review, enrichment, or reinforcement. Quizlet is great, various websites with science news articles, or, depending on your state, practice exam questions. 
  8. Change an assignment to a Google Doc - Google Docs have a lot of advantages, they can be accessed anywhere, they save automatically, and they can be shared. It is fairly easy to upload an existing assignment and convert to a Google Doc, making a copy for each student, or distributing through Google Classroom. 
  9. Video instructions of a lab or of a lab demonstration - If you are doing a demonstration, or giving instructions of how to do a lab, it can be extremely helpful to video this. Students can rewind and pause, students who are absent can watch, and somehow they even seem to pay closer attention to a video than to the teacher! This video can be uploaded privately to YouTube, or to Google Drive and shared with students as needed, or posted in Google Classroom. 
  10. Background research or vocabulary research going into an activity - before beginning a unit or an activity, we all know that students need to build background knowledge. As they are all coming from different places, and starting with different amounts of background knowledge, it can work well for them to research vocabulary terms, or a specific topic for background knowledge on their own, before diving into the instructional part of the unit. 
I hope this helped you consider some ways to start using technology in your 1:1 classroom! It can be overwhelming, but don’t get overwhelmed. Take it one step at a time, and don’t be afraid to try something.

Questions? Ideas? Suggestions? Please comment below or join me in the Facebook group.

Bite Size Steps to Increase Classroom Technology

Sep 9, 2018

How to Organize Bellringers or Tickets Out

How to Organize Bellringers or Tickets Out

How to Organize Bellringers or Tickets Out

What are some of the concerns? 

I have been asked about how I organize my bellwork and warm-ups, both in terms of how I organize the papers and the class time. Some of the complaints that I've heard are against doing warm-ups are: too much grading, too much time being spent in class time, wasted for students to settle down, too much shuffling papers and more.

Grading

I have already addressed the grading in a couple of other posts here, here, here, and here.

Timing

As far as the class time I'm really a stickler for using a timer and keeping my bell work very short. I know some people do bell work that's a bit longer, it depends on the length of your class, and how you want to run your class time.  I usually keep it to three to five minutes. My bell work is one two three questions. If it really seems that people are working and need an extra minute or two I make extend it.

I enforce that by using a timer that is visible on the Smartboard. Depending upon how you setup your bellwork there are stand-alone timers, internet timers, Smartboard timers, the 1-click timer Chrome extension and many others.

Paper Organization

As far as how to organize the papers I've done it a few ways. I like to keep all my bellwork questions for a one-unit together in either a Google slide presentation, PowerPoint, Smart Board file, etc. Then I have the students answer on a bellwork or warm up sheet link here.  They turn this in each day.  Before their class, I spread them out on either a back table, counter, or something like that.  On their way in the students can grab the paper with their name on it. It's a little extra incentive for them to get to class early or at least on time because the timer starts when the bell rings.

Electronic Organization

When I have done bellwork electronically I have most often used a Google form. I share the link through Google classroom.  They can quickly click on it answer, and all the answers come to me in one place.  I can also turn the form off when the time is up, so that they have to submit in a timely fashion.  I have also done a Google slide.  In this case, I have all my warm ups in that slide file. I copy just today's slide. share it with them through Google classroom or through a force copy.  They put their answers on it and then submit.  Google Classroom really facilitates this very easily.

Class Time

As far as during class time I can usually make a quick assessment if I want to discuss bellwork or go over it based on what I see when students are working.  If I use a Google form where I can get instant feedback then, I can pull the results up on the board and this can help me assess and decide if I want to have a class discussion. If I find out that I'm wrong it's perfectly okay to go back the next day.

What questions do you still have?  Ask them here and I will do my best to answer!

Jul 15, 2018

What do your students need to know and be able to do to be confident using Google Drive?

What do your students need to know and be able to do to be confident using Google Drive?


Tips and strategies, as well as helpful links to prepare your students to be successful as they start using Google Drive and take full advantage of the benefits

Benefits of Google Drive

Google Drive is a great tool and it's easy to use, but students need to be comfortable and confident for it to be successful. Students can store any file in Google Drive, access them anywhere, share with others, work saves automatically, and they can search for their work.

How to Best Prepare Your Students

However, to take advantage of these benefits, students need to be comfortable with Google Drive. What they need to know will really depend upon the assignment that you want them to do but some basic skills and facts that student should know include the following (I am including a link with a good summary to each):

  1. Understanding sharing settings 
  2. Understanding how to search for and save (organize) files
  3. Basic formatting tips -- the G Suite Learning Center is a great resource, even with printable PDF’s that would be great to put on tables, or hang around the room! I am linking here to the section on Docs. 
  4. How to make a forced copy (this can also be done through Google Classroom
  5. It may help students if you make a template that they can fill in. This takes away a lot of the fear of staring at a blank document. You you could give the option of using a template. Some students will want to be creative but not all. I often make a template with a forced copy link as in #4. Another option is to make a template, as described here
  6. Think about the specific assignment that you want them to do, and what skills will come in most handy.

When and how should I teach these?

I am not a big fan of doing a big intro, but a quick mini lesson, or even a few steps at the beginning of the assignment that will teach and review the necessary skills. These assignment specific skills might include things such as:
  • inserting pictures 
  • formatting 
  • inserting links 
Be patient as students are learning new technology. We often think that they are ‘born with technology in their hands’ and that they already know all of this, but in many cases they do not. They may know some technology skills, but not necessarily the academic ones we are trying to teach them. Work with your students and you may learn something from them too.

Sep 27, 2017

4 Technology-Rich Ways For Students to Demonstrate Knowledge

4 Ways to Students to Demonstrate Knowledge with Technology

4 Technology-Rich Ways for Students to Demonstrate Their Knowledge

Many times we asked students to do class work in such a traditional manner, such as to write a research paper, write an essay to present their knowledge, in written form only. While it is important that students can read and write, This is not the only way for them to show their knowledge. It's important to give an element of choice as well as to give variety throughout the year so that students who excel in other areas, or who struggle with writing have a chance to show their knowledge.

Why not just write an essay? 

Perhaps that particular student is not a strong writer, but really does know the content. Or may they are really good at animation, graphic design, sound effects, or some other aspect. It's time that their knowledge show through. Some great ways for them to demonstrate their knowledge, other than written expression would be a screencast, Thinglink, a PowerPoint or Google Slide presentation, a podcast, or even an animation such as PowToon. Sometimes, even if the student is a stronger writer, having an aspect of choice is so important. Allowing the student more choice over how to demonstrate their knowledge is a way to get more buy-in and engagement from him or her, and more excitement about the assignment.

Podcast

A podcast is a very easy alternative to implement, and has many different applications in the classroom. Students could simply do a voice recording on a tablet, phone, computer with a microphone, or many other devices. If you actually want it to be posted as a podcast available online, this is possible too, and there are a lot of tutorials and guides online. However, for a single assignment, it would be appropriate for students to just make a recording, and it could even be shared as an audio file on Google Drive, if you choose. The downside of this is it of course you can't include any visual elements but for some students and some topics this will be enough.

Screencast

A screencast is a recording of the computer screen it can be done with a camera with it, showing the student's face, or without and can record only the tab or the desktop of the computer, along with recording audio. This is a very simple way to record a short presentation with narration, a technology skill, or student presenting or showing a particular topic or skill. There are lots of ways to do a screen test but my personal favorite is the Chrome extension screencastify I believe you can make a free recording up to 10 minutes and the results is saved right in Google Drive. Very simple!!

Thinglink

Thinglink is a paid product, but there are also free accounts with a few limitations. Thinglink allows the student to start with a picture such as a map, photograph, diagram, etc and then add certain buttons with information and links, videos, sound files, or even text documents and callout buttons to make a multi-media clickable image. Again, this depends on the topic, and how it is best suited. I think this would be great for presentations where you want to show a lot of information from different sources. A word of caution, be careful that the student is able to summarize their information, or paraphrase and cite the information, because it can be very easy to just cut and paste a lot of information. Thinglink is a great way to make a really different kind of presentation and include various kinds of information. Here is a great example of a human body presentation.

Powtoon

Powtoon will allow students to create an animation. They write the script, and record the audio, and then choose different backgrounds, characters, and what they will say. Here is an elementary example


Example Human Body Thinglink

Powtoon can be a lot of fun and very interactive for the students. It is quite different than what they may have done before. The warning on this one is that there will be a bit of a learning curve for students. It may take some time for them to get comfortable, so allow extra time to learn the technology if you choose this method.


Lastly, don’t rule out a PowerPoint or Google slide presentation. This is not really a brand new method, but can be an alternative to a written presentation. Both allow shorter, more broken up writing, and the insertion of videos, images, and other multimedia formats into the presentation. Google Slides is easier to insert videos and easier to share the final presentation. PowerPoint is easier to insert narration or sound files if this is something that you want students to do. Adding audio to Google Slides is difficult.

As we transition to using more technology, under the SAMR model, these may be some ways to push your teaching, and your students learning, to the next level, and to further engage your students. Have you used any of these in your classroom? What other alternatives do you utilize, besides a written essay, do you use for students to demonstrate knowledge? Please share in the comments.

4 Ways to Students to Demonstrate Knowledge with Technology

Nov 5, 2017

How to Use Technology to Differentiate


Using Technology to Make Differentiation Easier

How to Use Technology to Differentiate
We have all been there. We are supposed to teach students to meet the same standards, but we definitely do NOT have 25 of the same students sitting in front of us! How do you meet these varied needs within one class? You may have student reading at a huge range of grade levels, or students with a wide range of disabilities, and capabilities, or even students for whom English is not their native language. This is where differentiation comes in! Differentiation can be overwhelming, but it doesn’t have to be so overwhelming. You can make some small changes that can have a large impact on your students, and technology can help make that a lot easier for you.

As we probably are already aware, there are many different ways to differentiate. Differentiation is commonly broken down by process, product or content. For any of these methods, technology can be a great tool for differentiation. Here is good basic overview of the three types of differentiation, if this is new for you, or you want a quick refresher. I am not going to rehash all of that, but instead I will seek to give you some tips on how technology can help you differentiation.

Differentiation by Content

Differentiation by content refers to different ways that students could get the content, or perhaps even slightly different content. What students are learning may be different. Some students may get the material through reading, watching a video, small group instructions, or even different videos, or different reading levels. Students could even read text off of a screen, but use a screen reading chrome extensions so that the text is read to them.

Look into Newsela or readworks for levelled reading materials, and videos already discussed such as Bozeman Science, Khan Academy, Amoeba Sisters, Crash Course, and many others for content at the appropriate level.

This is a place to play around with a flipped classroom idea, and create an instructional video, even if students watch it in class. It allows them to watch and replay, take notes, while you work with other students, and maybe a third group of students reads about it. You can, essentially, be in more than one place at the same time.

This can be done by choice, or with different content sources assigned to them. Google Classroom makes it very easy to assign different content sources to different students.

For additional information, here are some great step-by-step directions for using Google Classroom to differentiate.

Differentiation by Process

Differentiation by process is all about what the students do to process the information, or HOW they get the content.  Differentiation by process can certainly overlap with content differentiation, as students may work through the content using one of these processes (think-pair-share, reflection, diagram labeling, etc). Content differentiation is the content itself. Process differentiation is how students take in the content, or what they do with it to process it. For example, even as students are taking in content, they can use screen reader extensions to read the text, use dictionary or translation tools to help understand the text.

Process differentiation means you may give an assignment with some options. Perhaps some students can work in a group, and other can work alone. Students can choose to use technology, or to do their assignment on paper. Students need a way to process the material, but there are many ways that this can be accomplished. Students can process their learning through drawing, writing, making a video, using a technology such a flip grid, talking with a partner and more. Some students may be helped by a video that they can pause, rewind, re-watch, and use closed captioning.

These methods may need to be taught, or alternated/cycled between, and then eventually students could perhaps have a choice. Another strategy would be to give students a choice between just two methods, and then gradually introduce other methods.

The Science Penguin has a great post on “Output Ideas.” Although these are designed to be on paper, it is not a leap to see how these could be differentiated even more easily with technology. Students could make a short recording, find a diagram and label it, type their response and more.

For more ideas check out this post on 4 Technology Rich Ways for Students to Demonstrate Knowledge

Differentiation by Product

Lastly, differentiation by product is probably the type of differentiation with which we are most familiar, where student create a product to demonstrate their learning and are given some type of menu, or choice. A very simple example is this Vocabulary Menu where students have a choice over what the turn in to demonstrate their understanding of the vocabulary terms.

This is also a great place to look at the post on 4 Technology Rich Ways for Students to Demonstrate Knowledge. Technology gives more options. Are you artistic? Make a poster. Not artistic? Make an infographic or slideshow, where you don’t have to draw. Would you rather write? Or speak? Write an essay or editorial, or make a podcast or video.

Just like in the regular class, without technology, differentiation is key to helping your students be engaged and feel successful. The methods to differentiate may be similar, but it is easier in some ways to make changes to the assignments and to have the changes be less visible (such as through the use of screen reader apps, or Google Classroom to distribute differentiated assignments to different students). There is less stigma attached. Also, technology helps create a classroom culture where students are more independent learners, learning in their own way. This is a great fit for differentiated instruction.   Using technology means you can use the tools available to you to help create modifications, or create additional instruction.  You don't have to create it all!

How to Use Technology to Differentiate


Aug 23, 2014

Innovative Technology: Google Drive and Google Chromebooks

I have been meaning to blog more often this summer, and haven't done so. The last couple of weeks I have been deep into learning about Google Chromebooks and Google Drive (which I was familiar with) and how to use them in the classroom. My school is going to be a 1:1 Chromebook this year as part of a pilot program. I was asked to be on the technology committee, so I have been at many meetings planning logistics and rollout procedures, as well as staff professional development.

I have learned several things from this Chromebook experience, before school has even started, and I will definitely keep you posted as the year goes along.

1) Roll out and logistics procedures are critical for things to go smoothly.

We have spent a lot of time developing procedures for checking in and out the chromebooks, labelling them, determining what the procedures will be for late entry and early dismissal students, where they will be stored and how to access them, how to carry and store them, etc.  These clearly stated and communicated guidelines and procedures will (hopefully) eliminate a lot of problems later on. The same is true in the classroom!  It is so important to think through all of these details and what-ifs ahead of time, and to develop, organize, and communicate with your students.

2) Staff training, comfort level, and staff being on the same page is also critical.

The IT Department from the district came to do some training with us.  They began by stating that they expected people to be anxious and fearful, or opposed. Our staff was mostly not.  They were very excited.  We have a great staff.  However, I think a lot of the positive attitude was also due to keeping people informed ahead of time, providing resources and training so they are comfortable, and providing ongoing support and training so they  know they won't be lost.  I think people are much more likely to try something new when they are comfortable and feel successful in what they are doing, and know that they will have support.

Again, the same in true in the classroom!

3) I think this technology has the power to change the classroom, as we know it.

I used a smartboard, and powerpoint, but I don't use them extensively.  They are a great way to present graphics and diagrams, or do whole class instruction, but most of the best educational practices are not geared around whole class instruction with the teacher at the front of the room.  If you are using these technologies a lot, I fear that is what is happening.

Google drive, however, offers a way for teachers to spend less time copying and organizing work, and for students to keep their work organized.  It automatically saves, and teachers can provide templates or work to students to complete right in their Drive.  It also offers real time collaboration, commenting, and feedback, as well as research resources immediately in the hands of every student. It allows them to look up information, search for help, spell check, create documents, critique each other's documents, and watch videos or take notes, somewhat at their own pace.  They can go back and edit, go ahead, or re-watch something. I also see many opportunities for individualization and differentiation, from additional research questions to apps that allow text to be read, or making the screen size different or changing contrast.

I am really excited about this opportunity, and I hope my students are too!

Sep 23, 2018

Formative Assessment Top 5 Round Up

Formative assessment is critical and can be easy!

Formative Assessment is Critical and can be easy

Why is Formative Assesssment Critical?

We often deliver a lesson, class ends, students come in the next day, and we aren’t really sure what they remember, or what they understand.

They come into class the next day, and we are ready to start today’s lesson, but actually the students are not ready to move on.  They are still confused on information from yesterday.

As important as we all know formative assessment can be, it can be tedious to keep coming up with worthwhile questions, in addition to lesson planning and grading.

How can it be Easy?

I can solve that problem for you!

We all know that we have enough on our plates without creating daily assessment questions. However, having the right questions can be really important to get the information that we want.

I have created full year bundles of warm ups for Biology and Earth Science.  You can see the questions and preview them in more detail by clicking on the links. 

The Biology set comes in both Google Slides and Google Forms (also includes directions to use in PDF format, or in other Learning Management Systems. The Earth Science Set is only available in Google Slides (with directions for PDF or other LMS; no Google Forms at this time). 

Both include sets for each unit typically taught (13 units for Earth Science and 10 units for Biology), as well as a bonus set with some blank slides/forms, and general formative assessment questions that can be used anywhere you choose.  Each set includes 16-18 slides/forms with generally 2-3 questions each.  They are correlated with learning objectives (Biology and Earth Science), so that all objectives are covered.  Answer keys are included.  Many questions include diagrams, inferencing skills, etc.  There are a range of questions difficulties and styles of questions, allowing you to differentiate for your students. 

This is a topic that I have written about extensively, because I think it is so important.  I also written about other ways that I use these digital task cards, and how and when I use formative assessment.

My top 5 most popular posts on these topics are here:

I hope this answers most of your formative assessment questions.  If not, just comment an ask!!!I hope this answers most of your formative asses

Next time students are entering class you will be able to have a clear understanding of where they are and what they understand before you begin teaching.   I can make that extremely simple for you pull off!  Check out my full year bundles here.


Aug 8, 2016

Back to School Secondary Science Huge Giveaway!!


As much as I hate to admit, the end of summer vacation is getting close, and we have start thinking about school starting up!  Luckily for you, the secondary science teachers of Teachers Pay Teachers are here to try to make your life easier as you head back to school! 

This is a great chance to buy some new digital resources, if you have new technology this year.  

    Photosynthesis and Respiration Sort - Google Drive/One Drive  Circulatory System Google Drive/OneDrive  Macromolecule Google Drive/OneDriveFree Chrome Extensions for Differentiation and Modifications
If you have a new prep, you might want curriculum guides, or even a big package where you will get all the products in my store related to either Earth Science or Biology. 

AP Environmental Science Curriculum Overview and Resource List    Earth Science Curriculum Guide     
           Buy my Store - Biology        Buy my Store - Earth Science

 If you are teaching Biology you might be interested in this growing bundle.  It gives you a full year of biology warm ups, in both full screen/digital task card AND google forms format!  As it is still a growing bundle, so you get it at a discount now as it is still growing.
Biology Warm Up or Exit Ticket Assessment Growing Bundle:

Lastly, if you are looking for some tools to help you organize your classroom and simplify things as we head back to school, you might be interested in this Classroom Organization Pack.

Classroom Organization Bundle
We are giving away individual giveaways, prizes, and shopping sprees at each individual store AND 
we put together one HUGE blog hop giveaway, just for science teachers teaching grades 6-12 science: Four $100 Teachers Pay Teachers gift cards!  

For my individual giveaway I am giving two lucky winners $15 in resources from my Teachers Pay Teachers Store.  You can enter that at the first rafflecopter below.   You have lots of options to enter. 

For the HUGE blog hop giveaway, each blog post has a secret code word and a number.  My clue word is 13. FLOW.  The number tells you where the word falls in the secret sentence.  Collect the words from each blog, write them down in number order, and copy the secret sentence into joint rafflecopter giveaway.  This rafflecopter form is the same on every blog, so you only need to enter once from any one of our blogs!  You can enter that at the second rafflecopter giveaway below. 

a Rafflecopter giveaway

Mar 18, 2017

How Can Digital Task Cards Make Your Life Easier?

How can having a year long set of digital task cards save you time and stress

My son was up sick last night. I'm exhausted.  I feel like I might be coming down with something. and my other son has an art show tonight that I really need to attend -- that's after I make dinner and do homework.

I really want to assess where my students are with the topics we have been learning, but I just can't face the idea of coming up with questions, making up a quiz, game or other activity, and then bringing that stack of papers home to grade!  I never want to feel like I'm cutting corners with my teaching. but sometimes I need a break.  My principal is big on data driven instruction. I do see the value in it, but where am I supposed to get all this data? And how do I have time to analyze it?I need something ready to go, and effective.  I have an idea what I want to do tomorrow, but the idea of making a warm up, a closure activity, collecting data and assessing so frequently is too much!

I believe in doing warm ups and tickets out (freebie) and I do them almost every day but I'll be the first to admit that making up questions, and grading them day after day can be tiring. Its an additional piece to your lesson planning on a regular basis.  I understand!  However, a set of 180 science prompts, 8 general formative assessment prompts, and some blank templates could really take that pressure off!  You have a bank of questions and ready made prompts to use.

You may have already seen me writing about ways to use task cards in the classroom,  my Human Body Systems Task Cards, the options you have with the full year formative assessment bundle, how to save time grading with google forms and using digital interactive notebooks in general.  As you can tell, this is a topic that I feel strongly about. We are in a time period when digital resources really have the potential to make things easier on us, and to make us more effective teachers.  Digital task cards can be used so many ways that they really do provide and answer to this.

If you teach biology, this full year bundle covers all that topics that you are likely to teach. The task cards are available in three format (Google Forms, Google slides, and PDF). That means you have options.


If you are looking for a warm up or closure, with data collection, and you have technology you can use the Google Form, and have the data immediately collected and tabulated for you. You can even get graphs of how many students chose which answer if its multiple choice.

If you only have some technology (not 1:1), make it a station.

Maybe you have a short activity, or some notes, but you want to really see how well students understand, use just one task card for a ticket out.

If you are looking for a full-period activity you can use the digital or print versions of the task cards, choose the ones that relate to topics you have already taught, and set up stations.  Since each task card has a couple of questions on one topic, it is easy to quickly pick a topic, or a few topics, and get a picture of how your students are doing.

Your students can fill out their answers quickly on one sheet of paper so you have less paper to cart home.

This is a tool that you can use all year long, on any topic. Think of it as a test bank, with ready to go questions and diagrams organized by topic and available as a printable or digital format.  It makes it very simple to build in pre-assessments, closure activities and to collect data on a regular basis as you go through the unit.

The next time that you are dragging, and don't feel like making lesson plans, use it as a day to collect some data.  Set up stations where students do task cards on recent topics, either digitally (less grading for you!) or on paper and see what they know.   Or do a short activity with a ticket out. But know that you have a whole bank of questions to choose from.

How can having a year long set of digital task cards save you time and stress

Apr 29, 2016

Classroom Routines at the END of the year!?

What kind of classroom routines do you put in place?  As the year wraps up, I think it is a critical time to think about classroom expectations and routines that you want to change for next year. It is also a good time to try out a new procedure or routine that you are thinking about for next year.

I know its a hard time of year to think about that, but its worth it. If there is a classroom ritual or routine that you have been thinking about implementing, but aren't sure, this can be a good time to try it out.

Think of it as a pilot program :).  Granted, some things are different at the end of the year than the start, but it gives you a chance to get a feel for what you want to try, and then think about changes that you want to make for the upcoming year.

What kind of classroom routines do you put in place?  As the year wraps up, I think it is a critical time to think about classroom expectations and routines that you want to change for next year. It is also a good time to try out a new procedure or routine that you are thinking about for next year.


In the past I have changed my homework policy for the last unit or last marking period. I have tried a positive behavior incentive system (it doubles as a good way to keep students motivated at the end of the year).  I have also changed how I did the start of class, or the end of class.   Here is a starting point for reading about behavior incentive systems. I know they are controversial, and can be problematic, but they can also be helpful.  Along with this, another behavior system to try can be classdojo.com. If you haven't heard of classdojo yet, and have a class that is struggling with either behavior or just is not really engaged and motivated, it can be a great tool. You may want to check it out!  Both of these systems take some work and adjustment on the teacher's part, so the trial period/pilot program is a great time to see how you like it, and if it will work for you, or what you want to adjust.

Another area you may want to experiment with is how you start or end class.  It is so important to teach students not to waste time in class, and to come in 'ready to go.'  Part of this means being on time, but it also means engaging your brain at the start of class. Whether its a quiz on yesterday's class, an open-ended question to get thinking about today's topic.  If you use a timer, it becomes a way to really keep students focused and get on task at the start of class.  It is also important to give some students some closure at the end of class, and for both you and they to get a good understanding of their learning and comprehension.

I do think through both warm-ups/bell work and exit tickets.  Over the years I have done warm ups on a smart board or even an overhead (gasp!), and had students answer on paper.  When I did it that way, a big time saver is this bell work sheet.  It will save you time at the copier, and also save time grading, and save class time as students aren't scrambling for paper to write on.

If you are thinking about using Google Forms or Google classroom, they are another great way to do warm ups or tickets out.  I have created a set of warm-up/tickets out in Google Forms that you could try out. I also have the same set of warm ups in Google Slides and an PDF's, if you prefer to project them, do them on paper.  These will eventually be part of a growing bundle of warm ups and tickets out on various topics to use throughout the year (should be posted this weekend).

If you are thinking about trying out different seating arrangements, use editable seating templates to get some ideas going.

 Finally, if what you really want is general tickets out, that are not topic specific, check out this freebie.  Tickets out can be used for reflection, formative assessment, or closure on a lesson. These four freebies are part of a larger pack that is NOT subject specific and can be used in so many different ways.

If you are looking for a timer, to use for bellwork, I have used several free options.  Within the chrome browser is this extension for 1-click timer.  If you use the Smartboard you probably already know that there is built in timer.  If you are looking for a freestanding time in Windows here is good one.  It is 'portable' which means that you don't need to install anything (say on a district computer where you can't install) to use it.

Hope some of these ideas were helpful, and give you a little bit of perspective on your classroom routines at this point in the year.

What things are you looking to change or try out?
Related Posts Plugin for WordPress, Blogger...